How to Connect Document Camera Aver F17 to Laptop: Easy Step-by-Step Guide

The Aver F17 USB connection is the easiest way to connect your document camera to a laptop for presentations, online classes, or demonstrations. In this guide, you’ll learn how to set up the Aver F17 USB connection properly, install drivers, and fix common connection issues in just a few minutes.
By the end, you’ll have your Aver F17 ready to use smoothly with your laptop, making your work or teaching much easier. Keep reading to unlock the full potential of your document camera right now.
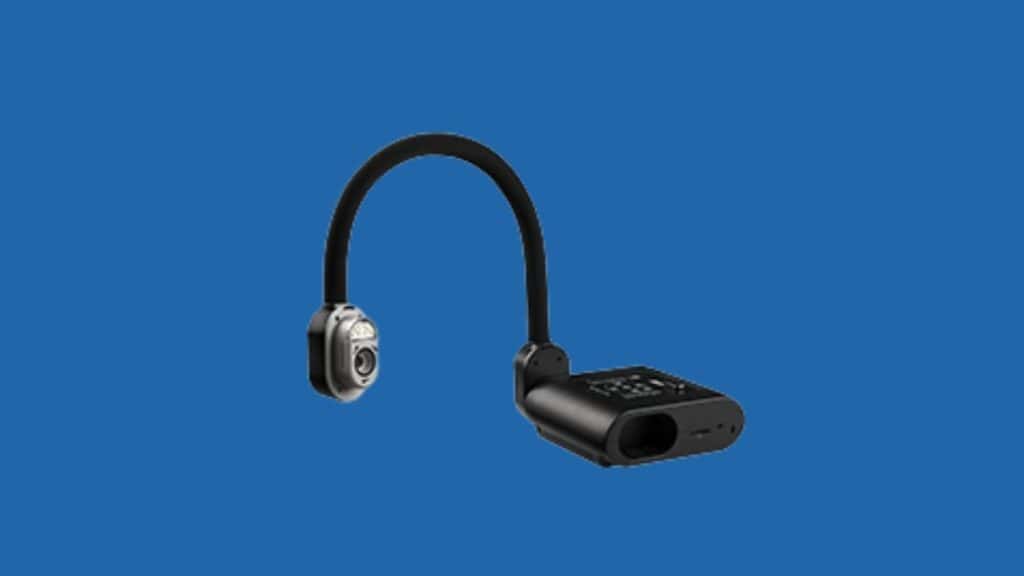
Credit: www.averusa.com
Aver F17 USB Connection Requirements
Preparing your equipment is the first step to connect the Aver F17 document camera to your laptop. Proper preparation ensures a smooth connection and avoids technical issues. Taking time to check compatibility and gather all needed cables will save frustration later.
Check Compatibility for Aver F17 USB Connection
Make sure your laptop supports the Aver F17 camera. Check your laptop’s operating system version. The Aver F17 works best with Windows and Mac OS. Verify that your laptop has the correct ports for connection. USB ports are commonly used for this camera. Confirm the camera drivers are available for your system. Visit the Aver official website for driver downloads. Installing the right drivers helps the laptop recognize the camera quickly.
Gather Necessary Cables And Adapters
Collect all cables needed to link the camera to your laptop. The Aver F17 typically uses a USB cable. Check the cable length fits your workspace comfortably. Have any adapters ready if your laptop lacks the right port. For example, use a USB-C to USB-A adapter if needed. Keep all cables untangled and ready to connect. Having everything on hand speeds up the setup process.
Credit: www.gmapswidget.com
Set Up Physical Connections
Setting up the physical connections for the Aver F17 document camera is the first step. It ensures the camera communicates correctly with your laptop. The process is simple.
Follow these steps to connect the device properly. Doing this right avoids common connection problems later.
Connect Usb Or Hdmi Cable
Choose the cable type that fits your laptop ports: USB or HDMI. The USB cable transmits both power and video signals. The HDMI cable sends high-quality video but needs separate power.
Plug one end of the cable into the document camera. Connect the other end to your laptop. Make sure the connection is firm to prevent disconnections.
Power On The Document Camera
Locate the power button on the Aver F17. Press it to turn the camera on. The power light will glow, showing the device is active.
Check if the laptop recognizes the camera. This confirms a successful physical setup. Now, you can proceed to software setup for full use.
Install Required Drivers
Installing the required drivers is the first step to connecting the Aver F17 document camera to your laptop. Drivers allow your laptop to recognize the camera and use it properly. Without the correct drivers, the camera may not work or show poor performance.
Follow the steps below to download and install the drivers safely and easily.
Download Drivers for Aver F17 USB Connection
Go to the Aver official website to find the right drivers. Search for the Aver F17 model in the support or download section. Choose the driver that matches your laptop’s operating system. Download the file to your computer. This ensures you get the latest and safest software for your device.
Run Installation Process
Locate the downloaded driver file on your laptop. Double-click the file to start the installation. Follow the simple instructions on the screen. Accept the terms and select the installation location if needed. Wait for the process to finish. Restart your laptop if the installer asks you to do so. After this, your laptop will be ready to use the Aver F17 camera.
Configure Laptop Settings
Configuring your laptop settings is essential for using the Aver F17 document camera properly. It ensures the camera works well with your laptop. Adjusting the settings helps you see clear images and smooth video. Follow simple steps to set up your device correctly.
Select Camera As Input Device
Open your laptop’s video or camera app. Look for the input device or camera option. Choose “Aver F17” or the connected camera from the list. This step lets your laptop use the document camera as the main video source. Confirm the camera is active and showing the live feed.
Adjust Display And Resolution Settings
Go to your laptop’s display settings. Find the resolution or screen size options. Match the resolution to the camera’s best output, usually 720p or 1080p. Adjust brightness and contrast for a clear picture. Proper settings reduce lag and improve image quality. Save changes before closing the settings menu.
Configure Laptop Settings for Aver F17 USB Connection
Testing the connection of your Aver F17 document camera to your laptop is important. It ensures the camera works properly and the video quality is clear. This step helps you catch any issues early. Follow the simple steps below to check the connection easily.
Open Camera Software
First, open the camera software on your laptop. This software controls the Aver F17 and shows the live video feed. You can use the default camera app on your computer or any third-party software that supports external cameras. Make sure the Aver F17 is selected as the active camera in the app.
If the software does not detect the camera, check the USB connection. Try unplugging and plugging the cable again. Restart the software or your laptop if needed. The camera should appear ready to use.
Improve Video Quality in Aver F17 USB Connection
Look at the video feed on your screen. The image should be clear and sharp. Check the lighting and focus to ensure the document is easy to read. Move the camera slightly to test if the image updates smoothly.
Blurry or lagging video may mean a weak connection or driver issue. Adjust the camera settings in the software to improve the image. Proper video feed confirms your Aver F17 is connected correctly and ready for use.
Credit: vocal.media
Troubleshoot Aver F17 USB Connection Issues
Troubleshooting common problems helps keep your Aver F17 document camera working well. Many issues are simple to fix with easy steps. Follow this guide to solve common connection and quality problems fast.
Fix No Signal Problems
Check all cables are plugged in tightly. Loose connections cause no signal messages. Use the original USB or HDMI cable for best results. Restart your laptop and camera to refresh connections. Switch to another USB port if the problem stays. Make sure the camera is powered on and selected as the input source in your laptop settings.
Resolve Driver Installation Errors
Download the latest driver from Aver’s official website. Old or missing drivers cause errors. Run the installer as administrator to avoid permission issues. Turn off antivirus software temporarily during installation. Restart your laptop after installing drivers. Check Device Manager to confirm the camera appears without error marks.
Improve Video Quality
Clean the camera lens gently with a soft cloth. Dirt or fingerprints blur the image. Adjust the focus ring on the camera for sharp video. Use good lighting around your workspace to reduce shadows. Change the resolution settings in the camera software for better clarity. Close other programs using your laptop’s camera to avoid lag.
Frequently Asked Questions
How Do I Connect Aver F17 To My Laptop?
Connect the Aver F17 to your laptop using the USB cable provided. Plug one end into the camera and the other into your laptop’s USB port. Your laptop should recognize the device automatically.
What Software Is Needed For Aver F17 Connection?
Install the AverVision software or compatible drivers from the Aver website. This ensures smooth communication between your laptop and the Aver F17 camera.
Can Aver F17 Work With Windows And Mac Laptops?
Yes, the Aver F17 supports both Windows and Mac operating systems. Ensure you download the correct drivers and software version for your OS.
How To Troubleshoot If Aver F17 Is Not Detected?
Check the USB cable connection and try a different port. Restart your laptop and reinstall the AverVision software if the camera remains undetected.
Conclusion:
Connecting the Aver F17 document camera to your laptop is quick and simple when using the USB connection. With the correct drivers, proper settings, and stable connections, you can enjoy smooth presentations and clear document viewing.
If issues arise, basic troubleshooting usually resolves them. With everything set up, your Aver F17 is ready to support teaching, meetings, and demonstrations with ease.
Helpful video guide: https://www.youtube.com/watch?v=m4Ge9IQFYCE


